
Getting started
This tutorial starts xtralab in a project folder, runs a coding agent, and reviews the changes that the agent makes.
Before you start:
- Install xtralab.
- Install one or more supported agents, for example Claude Code or Codex.
- Use a project folder that is a Git repository.
Start xtralab
Section titled “Start xtralab”In a terminal, go to the project folder and start JupyterLab:
cd my-projectjupyter labJupyterLab opens in your browser. The file browser shows the project folder, and the launcher opens in the main area.
The workspace
Section titled “The workspace”| Area | Contents |
|---|---|
| Top bar | The menu button (☰), the sidebar toggles, and the omnibox (Search…) |
| Left sidebar | Terminals, the file browser, the Git panel, and search and replace |
| Main area | The launcher, editors, notebooks, terminals, and diffs |
| Right sidebar | The Prompt Queue panel, after you queue a prompt |
Start an agent
Section titled “Start an agent”-
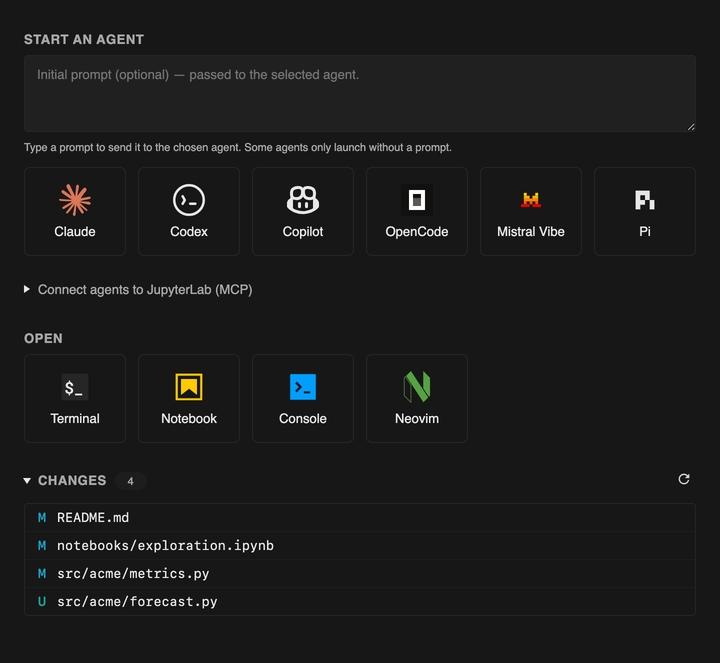
In the launcher, type a prompt in the Start an agent box. For example:
Add type hints to src/acme/metrics.py. -
Select an agent, for example Claude.
The agent starts in a new terminal tab with your prompt.
Review the changes
Section titled “Review the changes”-
Go back to the Launcher tab. The Changes list shows the modified and untracked files in the repository.
-
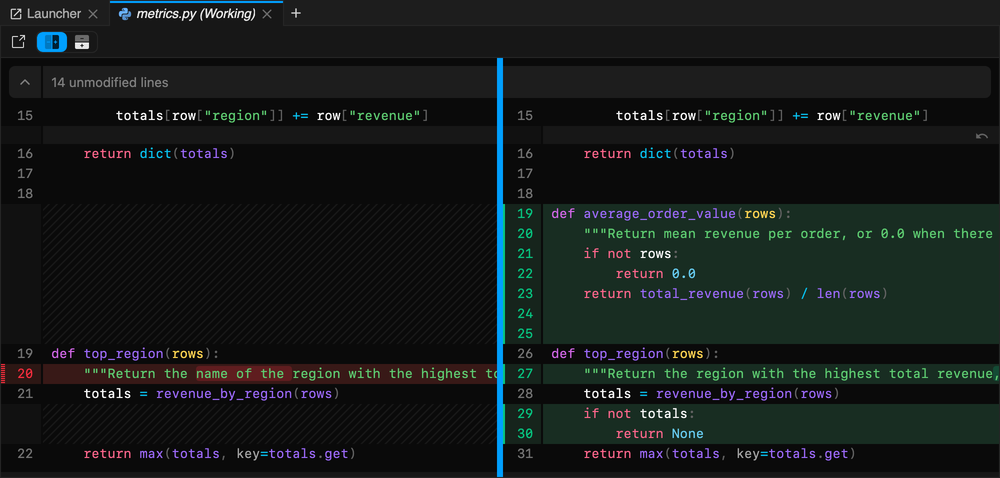
Select a file. Its diff opens in a new tab.
-
To correct a line, edit it on the right side of the diff. xtralab saves the change to the file.
Ask about a selection
Section titled “Ask about a selection”-
Open a file and select some lines.
-
Press Cmd/Ctrl+..
-
Type an instruction, then select the running agent as the destination.
-
Press Enter.
The prompt, with the file path, the line range, and the selected code, goes to the agent in its terminal.
Next steps
Section titled “Next steps”- Connect the agent to JupyterLab so that it can open files and run notebook cells.
- Queue prompts while you review a diff, then send them together.
- Read about the defaults that xtralab changes.